Saturday, May 17, 2014

week13:membina soalan text entry,multiple choice,drag and drop

Dalam flash cs3, terdapat 3 jenis teks iaitu input, dynamic dan static.

Input teks- teks yang akan dimasukkan oleh pengguna
Dynamic pula adalah teks yang boleh berubah.
Static text adalah teks yang tetap dan tidak berubah.

Membina soalan text entry

  1. Pilih jenis teks static text. Taip teks soalan,contoh: adakah hari ini hujan?
  2. Buat satu ruangan untuk masukkan jawapan 
  3. Buat kotak jawapan menggunakan tool shape rectangle dan set kan text pada kotak jawapan sebagai input text.Di bahagian properties, letakkan nama var sebagai answer.
  4.  Buat satu ruangan bagi response kepada jawapan teks entri tadi.
  5.  Pilih dynamic text tool dan namakan var sebagai respond.
  6.  Buat satu layer baru dan masukkan button. 
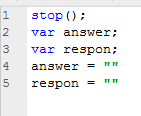
  7.  Klik kanan pada button tersebut dan pilih action. Coding yang perlu dimasukkan adalah seperti berikut. 

  8. jika jawapan yang diisi adalah yes maka akan keluar respon correct.
    sebaliknya jika pengguna memasukkan jawapan yang lain dari yes maka akan keluar respon memberitahu jawapan tersebut is incorrect.

    on(release) adalah apabila ditekan menggunakan mouse
    keypress pula adalah apabila ditekan pada keyboard(spacebar)

    8.  Tambah satu layer baru untuk stop, Klik pada frame pertama layer dan right click untuk masukkan action stop.


    contoh apabila jawapan betul:


    Membina soalan multiple choice.

    - Buat soalan seperti berikut.Teks gunakan teks static. ABCD adalah button dan boleh dibuat menggunakan tool shape.
    - Buat satu ruang respon dan set kan teks nya sebagai dynamic teks dan namakan var sebagai respon.


    - Klik kanan pada setiap button ABCD dan masukkan action. 
    - Pada jawapan yang salah masukkan action berikut pada button tersebut.

    -  setiap button boleh disetkan dengan respon yang berbeza.
    - Jika jawapan yang betul, boleh set kan respon= " correct, this is the correct time". 
    - respon adalah var yang dinamakan tadi, dan tulisan hijau tu adalah penyataan bagi respon tersebut


    ***Untuk drag and drop, saya akan buat pada entri baru sebab kelas yang terbaru dr.sykin ajar drag n drop yang lagi tepat


Wednesday, May 14, 2014

Action script 2.0 pada flash cs3 : gotoandplay & gotoandstop

Disebabkan lambat update entri yang ini, jadi saya ingat-ingat lupa langkah-langkah dalam buat action ini. Oleh itu, saya buka file, belek-belek dan akhirnya dapat ingat balik langkah2nya.

Beza action script dengan prgramming language.

-action script ,bahasa nya lagi simple

Kelas hari ini kami belajar action gotoandstop dan gotoandplay.

Bila nak guna gotoandplay?
Gotoandplay ini fungsi dia adalah apabila kita tekan sesuatu button tu dia akan pergi ke page tersebut.


gotoAndPlay([scene:String], frame:Object) : Void
Sends the playhead to the specified frame in a scene and plays from that frame. If no scene is specified, the playhead goes to the specified frame in the current scene. You can use the scene parameter only on the root Timeline, not within Timelines for movie clips or other objects in the document.

easily saying:
When the user clicks the buttons, the playhead moves to the specified location and continues playing.

Jom cuba!
  1. Buat button home dan activity.Type text seperti yang tertera dalam gambar di bawah.

   2. Insert keyframe pada saat ke 15
   3. 

       Letak nama bagi setiap button di bahagian properties.
       Pergi ke windows pada tab atas dan klik pada other panels>scene.Scene        yang pertama adalah home di mana di dalam home ada button                      activity.Pada langkah ini kita perlu duplicate scene supaya page tidak 
       berubah pada bahagian interphase ( ada button sama bahagian tepi).

duplicate-add scene-delete scene

Tekan duplicate scene dan anda akan dapat home copy.Tukar nama home copy kepada activity.
Klik pada scene activity dan type perkataan ACTIVITY di mana-mana ruang.Tujuannya bagi membezakan dengan HOME page.


    4. Tekan scene home semula.
        Right click pada button activity dan tekan actions.
    5. Keluar paparan seperti di bawah. Boleh klik pada box di bahagian tepi             kiri dan pilih goto.Edit coding di dalamnya. Atau tekan pada script                 assists dan type seperti yang tertera.
       "activity" adalah nama button activity tadi.1 pula menandakan pada 
          frame 1.  Klik x apabila selesai.


     6. Klik scene home. Tambah layer baru (layer STOP) dan klik pada frame              pertama.Seterusnya tekan kanan pada frame pertama dan klik action              dan masukkan actions stop. stop ();

Bila nak guna Gotoandstop?
Apabila kita klik pada sesuatu button atau objek 


gotoAndStop([scene:String], frame:Object) : Void
Sends the playhead to the specified frame in a scene and stops it. If no scene is specified, the playhead is sent to the frame in the current scene.You can use the scene parameter only on the root Timeline, not within Timelines for movie clips or other objects in the document.

easily said
When the user clicks the buttons, the playhead moves to the specified location and stops.


  1. Sambung kepada cara-cara gotoandplay.
  2. Klik scene activity.Add layer name act1 selepas payer STOP.
  3. Masukkan keyframe pada saat ke 10 dan pada saat ke 15.
  4. Type text ,dan namakan frame sebagai act1.
  5. Buat layer baru dan namakan activity1.Buat button activity 1. Masukkan keyframe pada saat ke 15.
  6. Right click pada button activity1,klik actions.Masukkan coding seperti berikut:
  7. activity adalah page activity dan act1 adalah text yang ditaip tadi. Apabila klik pada activity 1, maka text yang kita taip di bawah tu akan muncul.Text di bawah itu hanya akan muncul apabila kita klik pada activity 1.
  8. Di bahagian timeline frame pula, layer act akan menjadi begini;

credits : flashprofessional

Thursday, May 8, 2014

ONION SKIN

Tekap gambar di Flash CS3 !

1.Copy apa2 gambar ke dalam kanvas.


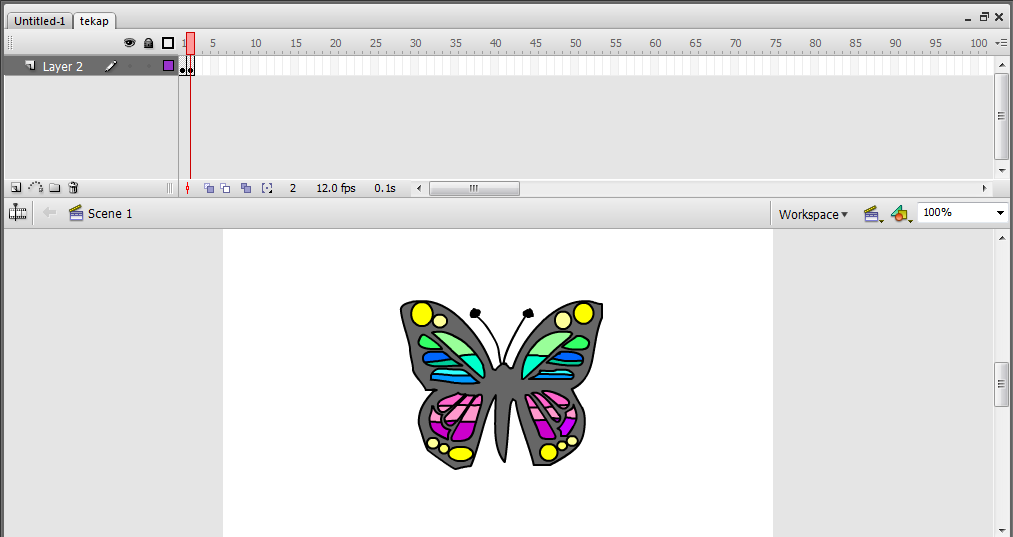
2. Pergi pada timeline > klik pada mana2 frame e.g: ke 2 > insert keyframe > klik pada butang onion skin (sebelah line merah, ada 2 petak bertindih dan belakang petak tu warna putih) > dan klik butang Del untuk padam gambar tersebut.
anda akan dapati gambar anda akan kelihatan  kabur-kabur.

3. Guna pencil tool dan lukis ikut gambar yang kabur-kabur tadi. Sebenarnya anda sekarang sedang melukis gambar dengan menekap . Bezanya anda melukis di komputer !

Kenapa kita lukis secara tekap ni?
Supaya kita boleh ambil sesuatu objek tanpa copyright.

hasilnya:


4. Gambar yang kita lukis ini, boleh convert pada symbol  dan digunakan banyak kali.

last but not least, rama-rama ni dilukis menggunakan graphic tablet jenama wacom yang diberi pinjam oleh dr.syikin.best lah juga guna..mudah sikit nak lukis berbanding guna mouse.tapi kalau nak betul2 mahir dr.pesan kena selalu guna.well..practice maker perfect kan..kan..oh ye waktu melukis ni kena hati-hati gak sebab kalau ada garisan yang tak bersambung antara lukisan  nanti bila nak warna jadi susah sikit.Jadi nak selesaikan  masalah macam ni, kena padam sikit-sikit garis tu dan lukis semula bagi garis tu bersambung.kacang jeee!haha..tapi sila bersabar.


Monday, April 28, 2014

Cara masuk audio ke dalam flash dan interactive button


Cara masuk audio ke Flash cs3

  1. Cari lagu( format mp3,wav)
  2. Buka Flash, pilih create new Flash File(action script 2.0).
  3. Klik file > import > import to library > pilih audio file > klik OK
  4. Sekarang audio file anda sudah disimpan dalam library.
  5. Drag lagu dari library ke kanvas dan masukkan keyframe di saat/minit yang terkakhir.
  6. Untuk edit audio tersebut, klik pada mana-mana frame dan lihat properties di bahagian bawah.Klik pada perkataan edit.
  7. Anda juga boleh buat effect pada audio tersebut seperti fade in atau fade out.

Cara buat interactive button

  1. Buat button guna shape tool.Boleh guna apa-apa bentuk dan taip teks dalamnya.
  2. Select semua, shape dan teks kemudian klik kanan dan convert to symbol : button.
  3. Button tersebut akan disimpan dalam library
  4. Klik 2 kali pada button yang telah dibuat tadi dan timeline akan berubah :


    6.    Warna asal button adalah pada frame up.
    7.     Masukkan keyframe pada frame over. Tukar warna button guna paintbucket.Warna button pada                   over ini adalah apabila kita meletakkan mouse kita ke arah button tersebut.
    8.    Masukkan keyframe dan lakukan langkah yang sama untuk down dan hit.
(down- warna button bila kita tekan, hit-warna button apabila sudah ditekan)


Sunday, April 20, 2014

Adobe Flash cs 3 | animasi mudah.

Sebelum kita membuat animasi, ada beberapa elemen penting yang perlu kita tahu .

Apa yang kita perlu tahu?

Jenis simbol
1.Graphic
- digunakan untuk gambar
2.Button
- butang(untuk klik) untuk capaian ke laman yang lain
3.Movie clip
- untuk animasi/gambar bergerak

Lihat langkah berikut.

Convert to symbol : GRAPHIC

1.Pilih apa-apa bentuk untuk dilukis.
2.Klik 2 kali pada bentuk tersebut dan tekan kanan.Paparan berikut akan muncul :

3.Klik ok dan secara automatik ia nya disimpan dalam library

 
Kelibihan convert pada simbol adalah objek yang disimpan di library dapat digunakan lebih dari satu kali. Pengguna boleh drag item ( dalam gambar) ke permukaan workspace dan bebas jika ingin menukar saiz. 

Convert to symbol : BUTTON

1. Pilih satu bentuk, contohnya rectangular dan type text dalam kotak tersebut.

2.Klik 2 kali pada objek tersebut dan klik kanan, pilih convert to symbol. Kemudian, pilih type : button
3.Klik ok dan ia terus disimpan dalam library.

Convert to symbol : MOVIE CLIP

1.Boleh guna bentuk/lukisan atau gambar. Kemudian, sewaktu convert to symbol, pilih movie clip.Dan klik OK.


Apa itu keyframe?
-gunakan untuk set kan bila objek mula dan berakhir

Apa itu frame?
- untuk masukkan pergerakan objek

Motion tween?
-untuk menghasilkan pergerakan

Shape tween?
-untuk menghasilkan pergerakan melibatkan bentuk.Bentuk tersebut akan berubah dari satu bentuk yang lain.


Cara buat motion tween

Untuk pergerakan lurus

  1. Lukis objek/bentuk
  2. Insert keyframe pada saat/minit terakhir yang dikehendaki
  3. Klik pada keyframe yang terakhir tadi dan ubah kedudukan objek tadi.Untuk mendapatkan pergerakan yang selari, gerakkan objek sambil menekan SHIFT.
  4. Klik pada mana-mana frame dan insertmotion tween.


Untuk pergerakan tidak lurus/pusing-pusing


  1. Lukis objek/bentuk
  2. Pada layer objek, insert keyframe pada minute/saat yang terakhir
  3. Klik pada add motion guide.
  4. Klik pada frame pertama layer motion guide.Pilih tool pensil dan lukis laluan(path) yang dikehendaki.
  5. Klik ke keyframe pertama layer objek dan drag object ke permulaan path.
  6. Klik ke keyframe last layer objek dan drag objek ke path yang terakhir.
  7. Klik pada mana-mana frame di layer object dan klik kanan dan pilih create motion tween.


Cara buat shape tween


  1. Lukis bentuk (contoh:empat segi)
  2. Pergi ke saat yang kita hendak set akhir sekali (contoh:30) dan insert keyframe.
  3. Delete bentuk ( empat segi tadi).
  4. Lukis bentuk yang lain(bulatan) di bahagian hujung keyframe.
  5. Klik mana-mana pada bahagian frame dan klik shape tween


Monday, April 7, 2014

Pengenalan kepada adobe flash cs3 professional

Kelas hari ini sekejap je..satu jam macam tu sebab ada mock test hari ni.hihi.

Okay.jum kite cerita sedikit pengenalan untuk adobe flash cs3 ini.


Perkara utama yang semua kena tahu logo untuk adobe flash.wajib la kan tahu.hehe


dah tahu logo?ok bagus.jum baca ni lagi.


Sewaktu kelas tadi, kami diberi tugasan untuk melukis satu gambar.ada pokok,awan,bukit dan matahari. Jadi, di situ kami berjinak-jinak dengan tool yang ada.Ini hasil seni saya yang tak seberapa.hehe.


Tool yang saya gunakan :

rectange tool       -  untuk objek bukit dan batang pokok
line tool               -  untuk bukit
oval tool             -   untuk matahari dan awan
pencil tool           -  untuk daun poko dan cahaya matahari
paint bucket tool -  untuk warna objek-objek

Pada mulanya, saya mengalami kesukaran untuk melukis daun pokok. Setiap kali saya  habis buat bentuk , line itu akan automatik tukar kepada betuk segi empat. Sama juga lah macam awan. Jadi saya google dan alhamdulillah jumpa jalan penyelesaiannya.

cara melukis awan ( cara lukis awan dalam video ni part nya yang last-last)

Cara melukis awan ni ada juga caranya yang lain, tetapi saya suka cara seperti yang dalam video itu sangat mudah untuk orang yang kurang berseni macam saya.hehe.

Jadi, buat masa ni lukisan dah siap tunggu kelas minggu hadapan untuk belajar buat tween motion pula.


update : 11 April ( percubaan menggunakan motion tween pada objek kereta dan pokok)


Tuesday, April 1, 2014

Create forum using php

1)Create table at phpmysql.Insert 3 rows: id,name and post


2)Open dreamweaver.file>new>php
3)You will used 3 types of server behavior here: insert record, recordset,repeat region
4)First insert form and type name and message. Put text field beside the name and message.Change the properties of the text field according to the name you insert at the database.name as name and message as post.
5)Then, insert submit button and change the button name to post.
6)Save it as forum.php.
7)Window>server behavior>insert record
8)Outside the form line, type comments from others

9)Go to window>Server behaviour>recordset

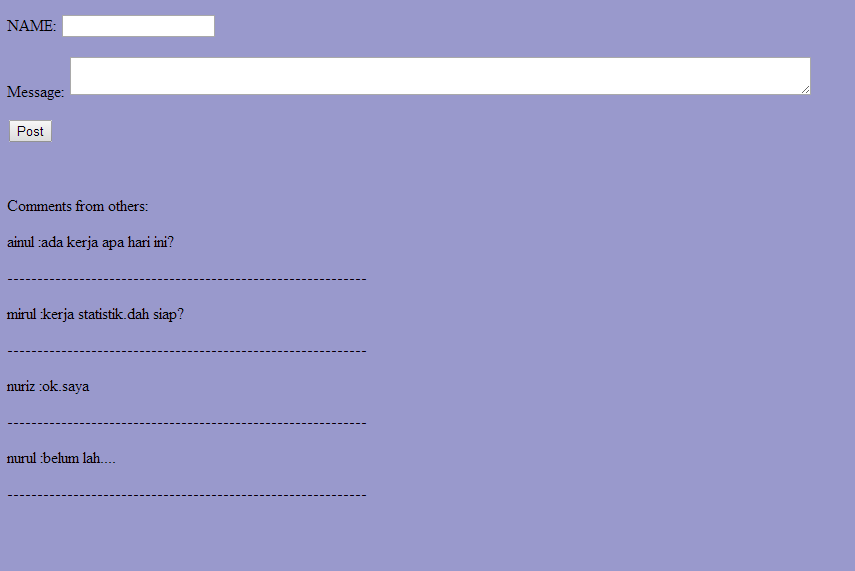
10)Go to binding panel and drag name and post under the comments from others. Then, highlite it and go to server behavior>repeat region.


Preview:


Develop Questionnaire and forum using php

For this week class we learnt how to create questionnaire and forum using php.

First, lets start with questionnaire.

1.You need to set up the database first.
 Login>create table>save

2. Open dreamwever>new>php
3.Toolbar layout>div tag.Next, insert form.
4.Type questions.For the answer we will use radio group. Click insert>form>radio group

-name type bangsa
-Label type the options/answer such as melayu,cina ,india and put the value 1,2,3
-click + if you want to add another option
-layout  using tick table
-click ok, and you will get this view

Besides, you also can tick *checked to the answer.This prevent user to leave unchecked for the question.

5. Insert Submit button.
6.Save your file and name it as quiz.html
7.Go to window>server behavior>insert record>after inserting, go to:thankyou.html ( will create later)


8.Now,we will create thank you page. File>new>html>type your text>save as thankyou.html


9.Here is the answer that have been key in
10.Other than that, we also can do analysis based on the answer. Such as, how many students agree for the question 1 b?

11.File>new>php>insert table>type text>


 put cursor at the table>server behavior>recordset>change name>connection;dmx>table choose quiz>columns tick all>filter: umur, = and entered value ,2 ( this refer on the value you insert at radio group)>ok


server behavior>display record count>display total record>choose recordset according to the name you have entered before>ok


arrange nicely by table

here is the preview

12.You also can find how many males with age 13-15 by using options advanced in recordset.This video might be help.


Forum tutorial will be in next entry.


Friday, March 21, 2014

more about php

Ok,first i'll share about the problems I encountered.

1. Using user authentication- no table found


   and when i click preview at previous exercice ( login.php) , this error came out:


Solution: Site>Manage site>check setting

2. When i closed my dreamweaver and opened it back to preview my project, this pop out came out.I posted my problem at the facebook group and a few of them says we dont need to set up each time we open the dreaweaver. The settings will be connect automatically. 


Solution : Click OK.It will bring to site management.Fill the settings.It was weird because i already fill it last time.So, ignore that feeling, and i just filled it.Clicked done, and this pop out came out and OK!


To double check it, I closed the dreamweaver, opened and previewed it...and it success.No pop out come out.

3.Using update record(updateuser.php), this pop out came out after i fulfilled all the empty box


Solution: phpMysql>table>drop id>add new row>add 1 column at beginning of table>tick index and A_I 

--not done yet and the pop out still came out

close pop out>at updateuser.php, add one row above the username>panel binding>drag recordset id to field id

done!

I'm going to do the tutorial next time since too many things to remember and i just don't get the flow.


wuhuu.okay,michael jordan.I will try my best :D


Thursday, March 13, 2014

PHP

#Assalamualaikum

For this week class, we learnt how to create dynamic webpage using php. Since i didn't bring my laptop so I just you use the computer in laboratory. And fortunately, the computer has been installed with XAMPP so there was no need to install it :) But still , i need to install when i'm using my laptop. So, here is the steps.

Installing XAMPP.

  • just download from the internet.easy and free: http://www.apachefriends.org/download.html
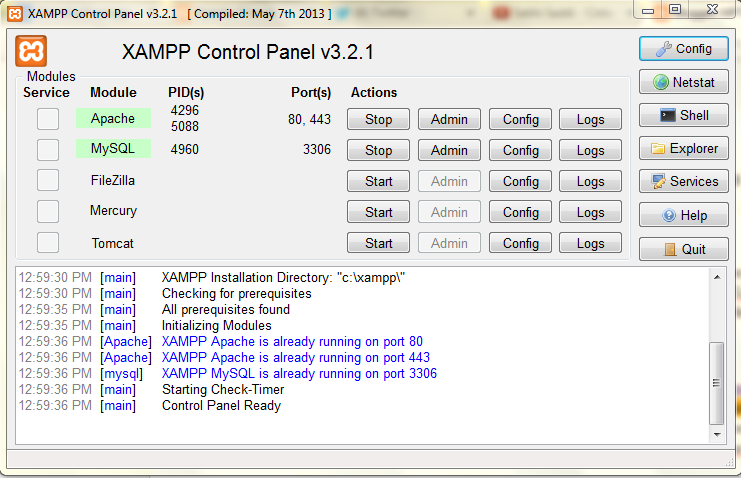
  • done downloading?okay.Now, you need to stop IIS from running( control panel>administrative tools>IIS>stop). Since IIS is automatically run each time you start your windows,you need to run mySQL and apache if you want to use it ( start>XAMPP control panel>apache>start>mySQL>start)

1.Creating database using MySQL
  • database name(info)>create>table>save. For this step, i refer to app3 that has been installed in ipad.
2.Create connection to database


  • Open dreamweaver>Open mySQL connection to do connection to the database in dreamweaver
3.Create php file
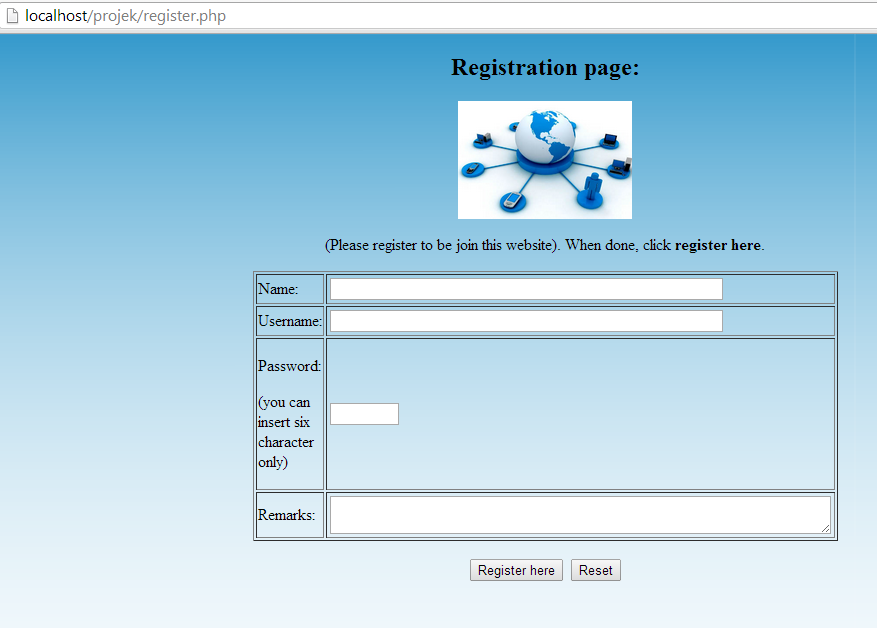
  • Name as register.php. We need to use form because user will key in their details.
4.Use insert record.
  •    Data that have been entered by user will be saved into database.
5.Create another php file
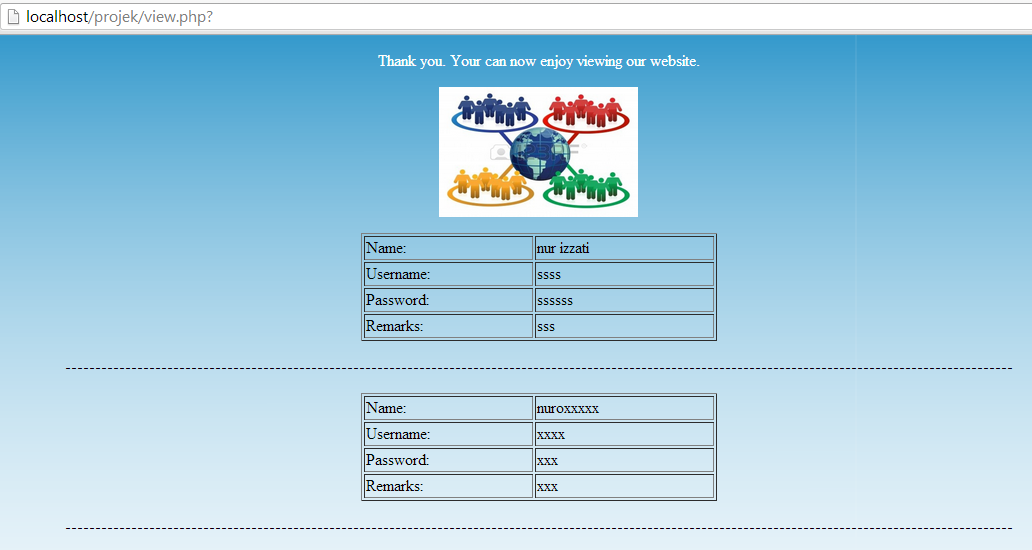
  • Name it as view.php.View.php will display data that has been entered.

6.Use recordset. 
  • Data will be read back/view from the database and display at view.php
7.Use repeat region
  • to view all that that has been entered by user


***don't forget:After done php file.double check the insert record.Open register.php,go to server behavior, double click insert record (at the box), go to option {after inserting, go to}, choose view.php.


Okay, so this is the preview of my file (register.php) and view.php.


ASP VS PHP?

From my experiences , PHP is more easy to use as I can develop this simple registration page in about 20 minutes I guess. While, when using ASP i finished it in 3 days as i'm  facing so many problems ( refer to my last entry). When using ASP, there are so many settings need to be set up before you start developing the dynamic webpage ( such as ODBC ). But for php, you just need to set up a few settings in xampp, create table easily save and just start creating file in php.Besides, there will be no error for php. So, I prefer php as it wont give me stress.haha
**will be update more later

todays quote: